Development Guidelines
Hello, dear SpeedX Marketing Developer!
We want to make your work and our collaboration easier and more efficient. We have noticed some aspects that regularly lead to errors.
Let's work together according to these new guidelines to avoid correction/feedback loops and therefore save extra work and stress.
General information#
- Please always confirm with
 or
or  in Slack when we send feedback, to make sure you have received it and that you are working on it
 - Please always tag the responsible Landeseiten DE employee with @Name, so that he/she gets a notification — if this does not happen, we waste time or information could get lostPlease check / ask us if something is unclear or if you did not understand words we used — we will then try to rephrase it / explain it
- Please let us know immediately, if you need more information / material (e.g. vector file of a logo if not provided yet) or if there are technical issues, which you can't handle yourself
- When you have an issue or question about a specific page in development, make sure to include the link to the page when posting your question on Slack, as it can sometimes be difficult to find the exact page without the link.
- It's not always best to respond only within a thread on Slack. If there's a more serious issue, it's better to reply directly in the channel, as it makes the message easier to see.
- Please check the new versions for obvious errors. Content adjustments are our job, but obvious errors are avoidable.
- If we provide reference pictures: take a look at them and orientate on them
- Please make sure that all involved employees get our feedback
0.1Development technic#
- All projects are developed on WordPress, and Elementor Pro is used as the page builder, and the use of the Landeseiten child theme with Hello Elementor Theme is mandatory.Download from here ⇒ https://github.com/felix-werner-landeseiten
- All pages must be created using Elementor elements (we also have additional elements available through the Essential Addons and Unlimited Elements packages). Creating pages using any other builder or custom code is strictly prohibited unless explicitly specified within the dev instructions.
- All necessary information for project development is provided through the document Development_Instruction Sheet.Please check / ask us if something is unclear or if you did not understand words we used — we will then try to rephrase it / explain it.
- After logging into WordPress with the credentials provided in the Development_Instruction Sheet, check and update WordPress and all plugins.
- If you receive a new project and information, links, access, or data such as images, videos, etc., are missing, you should report it to us immediately so we can locate the necessary materials. Additionally, please point out what is still missing by the time of submission.
- If your project includes animations, you need to inform the project manager after reviewing the design what type of animation you require (Lottie, MP4, GIF, etc.) as well as the sizes you need (1920 x 1080, 1280 x 800, 768 x 1024, 390 x 844, etc.).
- For better page load optimization, use as few elements as possible within the DOM. Therefore, we use the flex container system in page development. If you still only have the option for sections, check under Elementor > Settings > Features and Experiments > and enable 'Active Flex Container' under stable section
- Due to a very well-known bug within Elementor, under no circumstances should you use nested elements (slider, accordion, etc.). Instead, use the elements from the Unlimited or Essential element sets that you have available.
- The Slack channel for the project is always organized so that all important links and resources are pinned at the top of the channel. In addition, it is strictly forbidden to add anyone (e.g. a web-designer or other developer) to the channel for help. In case you need help, let the Landeseiten project managers know. It's their responsibility then to check the capacities and delegate the tasks.
- The breaking points for media queries that are checked upon the completion of the page development are: 1280, 1920, and 2560 for desktops and laptops, 1024 for tablets, and 360 for mobile devices. Of course, the developed page must follow the design from Figma at these resolutions.
- If you finish with a specific update or change on a page, it's also important to link the mentioned page so that we can easily find it and see the changes.
- If it's necessary to add a plugin while development is being done on the client's live WordPress site, always ask before activating a new plugin, as it could potentially cause issues on the client's website.
- Similarly, do not deactivate any already installed plugins (such as WP-Rocket, Elementor, Gravity Forms, etc.) without prior approval.
FwH0L4g@$Uz0&JLIStarting points#
1.1Screen breaking points#
Please make sure that you frame a webpage to certain resolution break points according to our instructions. Here is an overview for you:
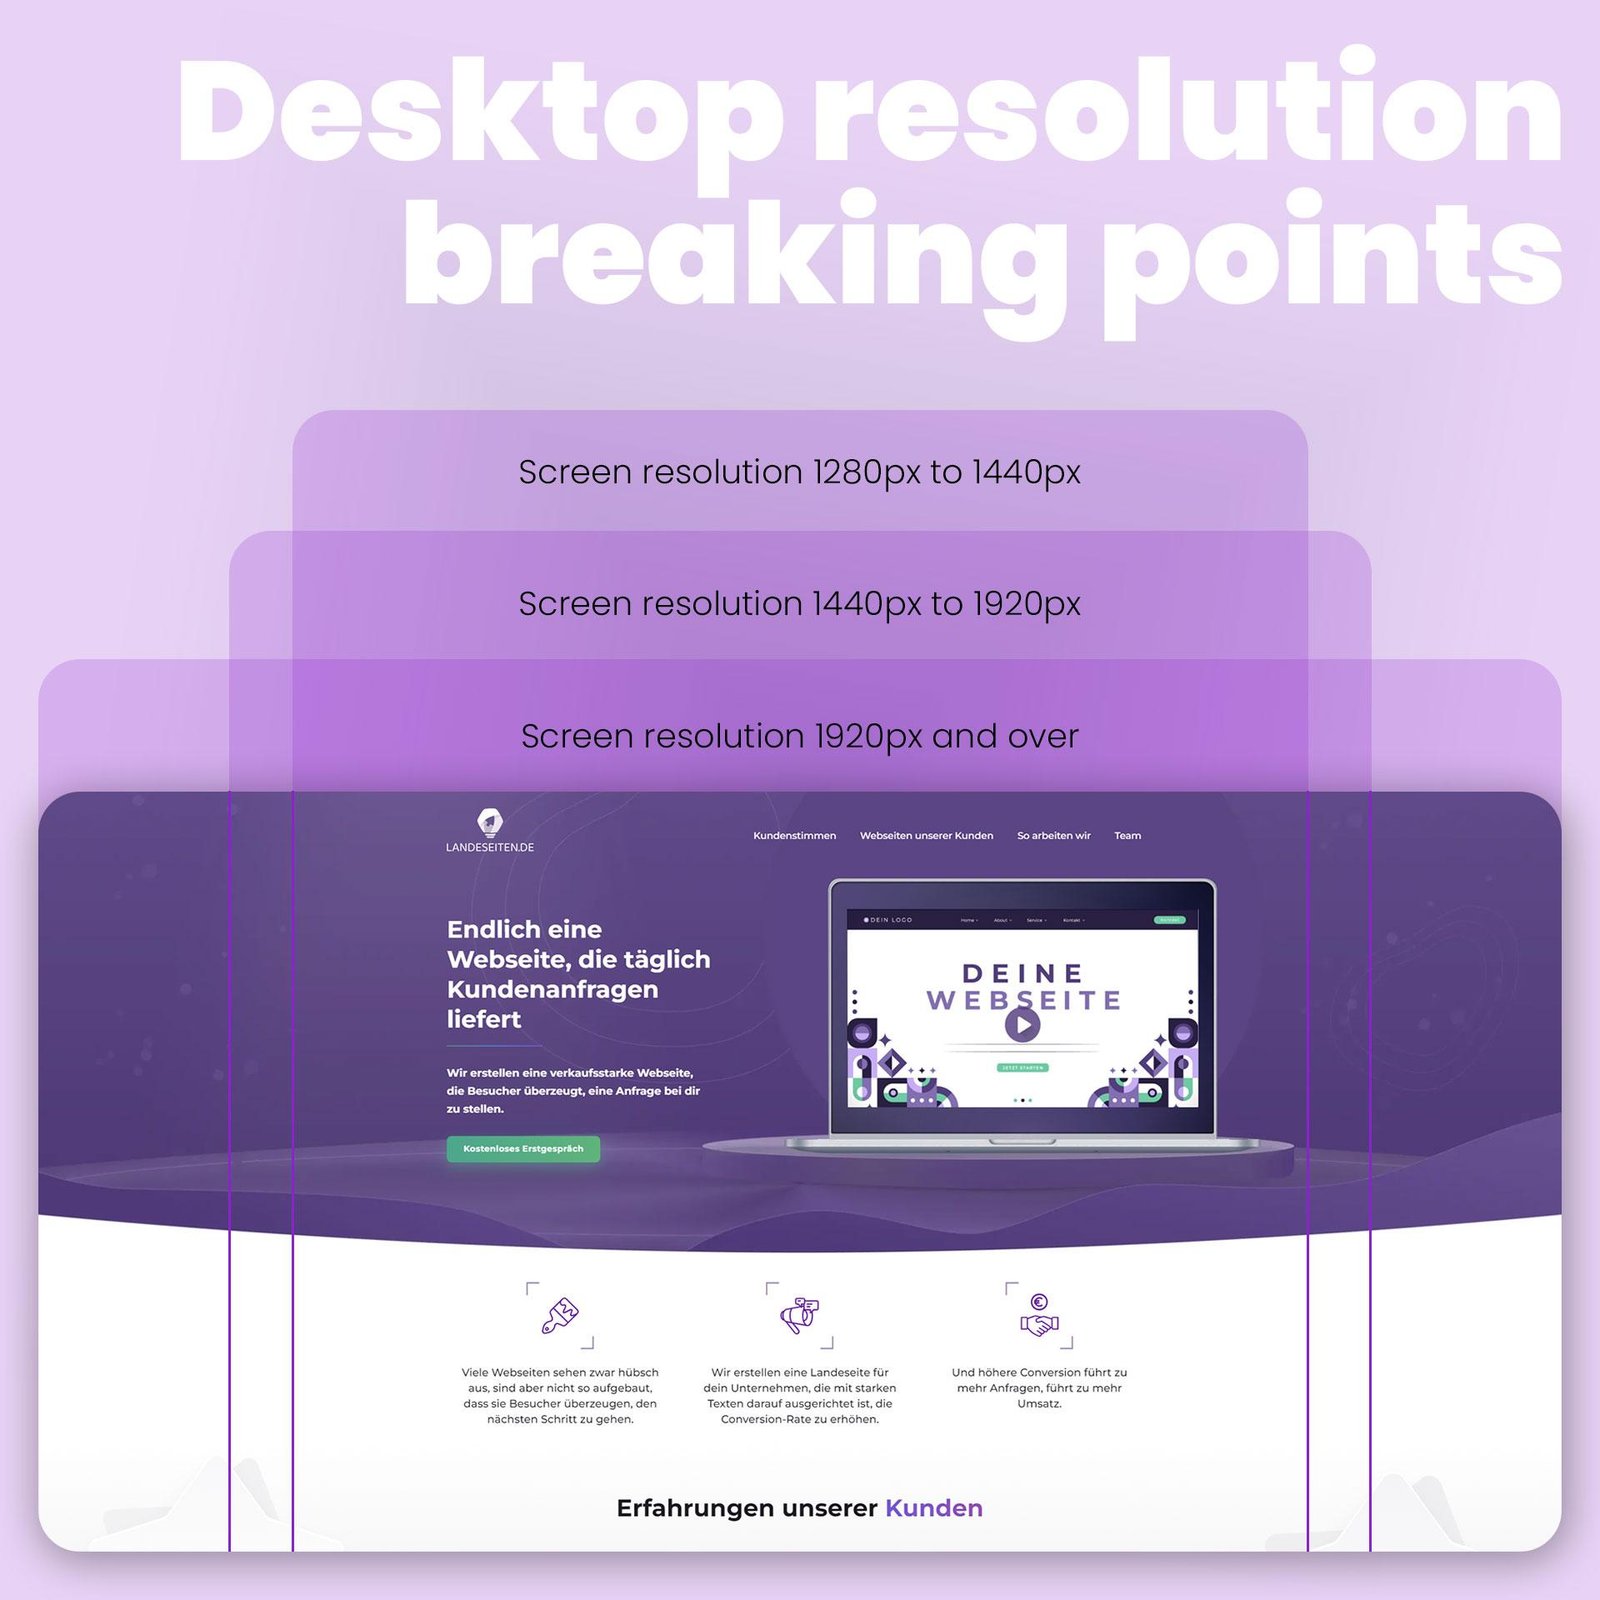
Within WordPress, the starting point for website development begins with the desktop resolution, which then passes CSS rules to other breakpoints.
The default values for media queries in Elementor are:
- Desktop: 1920px and over
- Tablet: 1024px and below
- Mobile: 576px and below
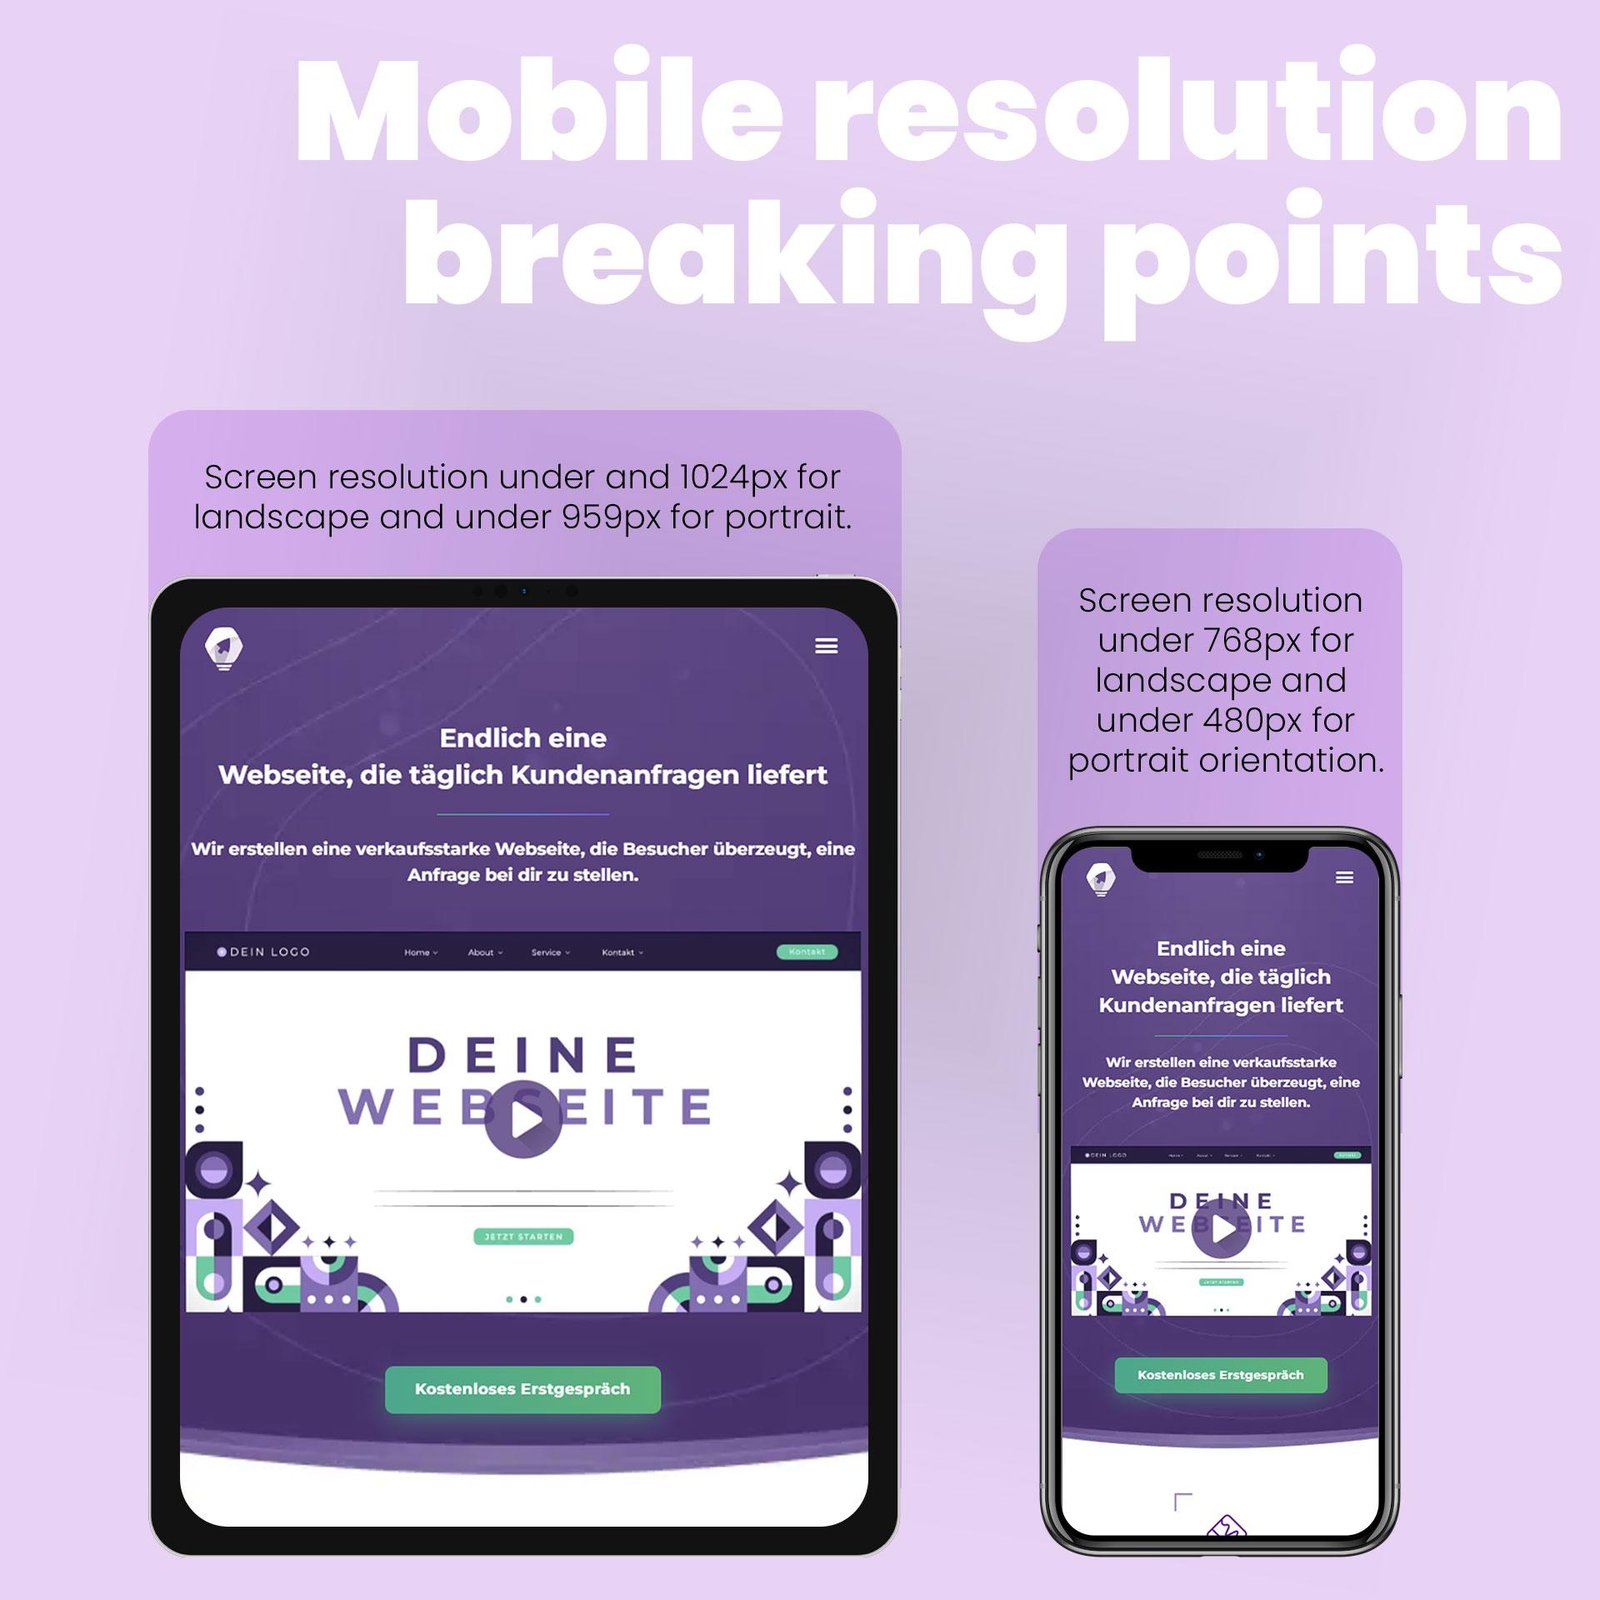
As can be seen in the image above, where we have an explanation of the breakpoints for mobile devices, for more precise control over responsive websites, our recommendation is to create additional media queries within Elementor to ensure the project displays correctly on all devices, you can see how to do this in the video below:
1.2CSS styling#
1.3Global Color#
Before starting work on the pages themselves, it is necessary to set up global variables for colors to make future changes easier. This can be done very easily by following these steps:
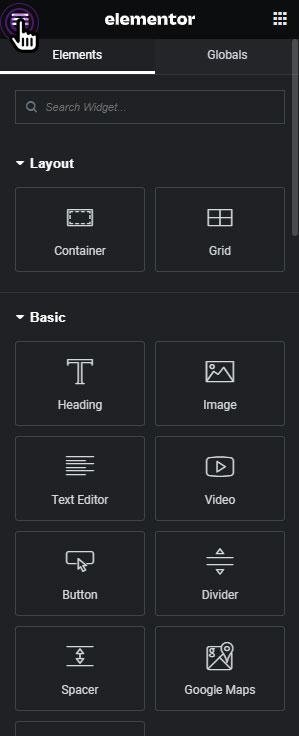
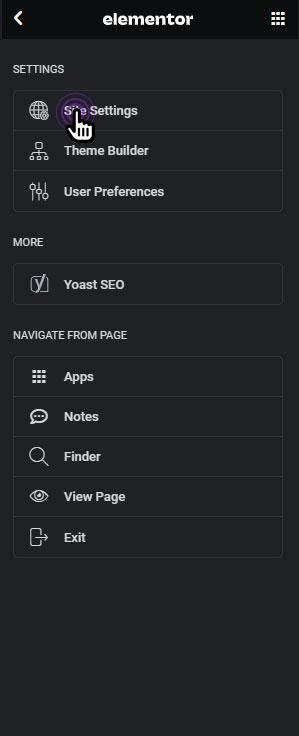
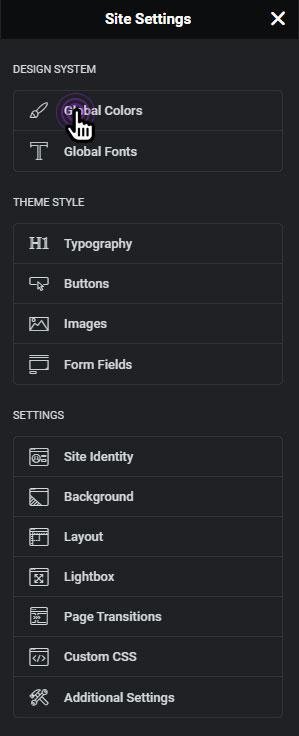
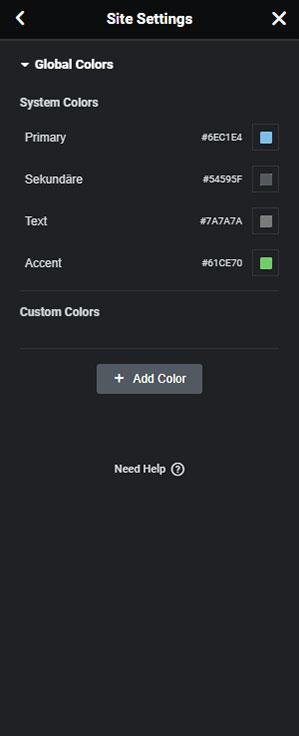
1.4Fonts (Custom Fonts & Google Fonts)#
When using Google Fonts through Elementor please enable the Load Google Fonts Locally option in the Elementor performance section (according to image). This will download the fonts automatically which helps speed and also makes the fonts GDPR safe.
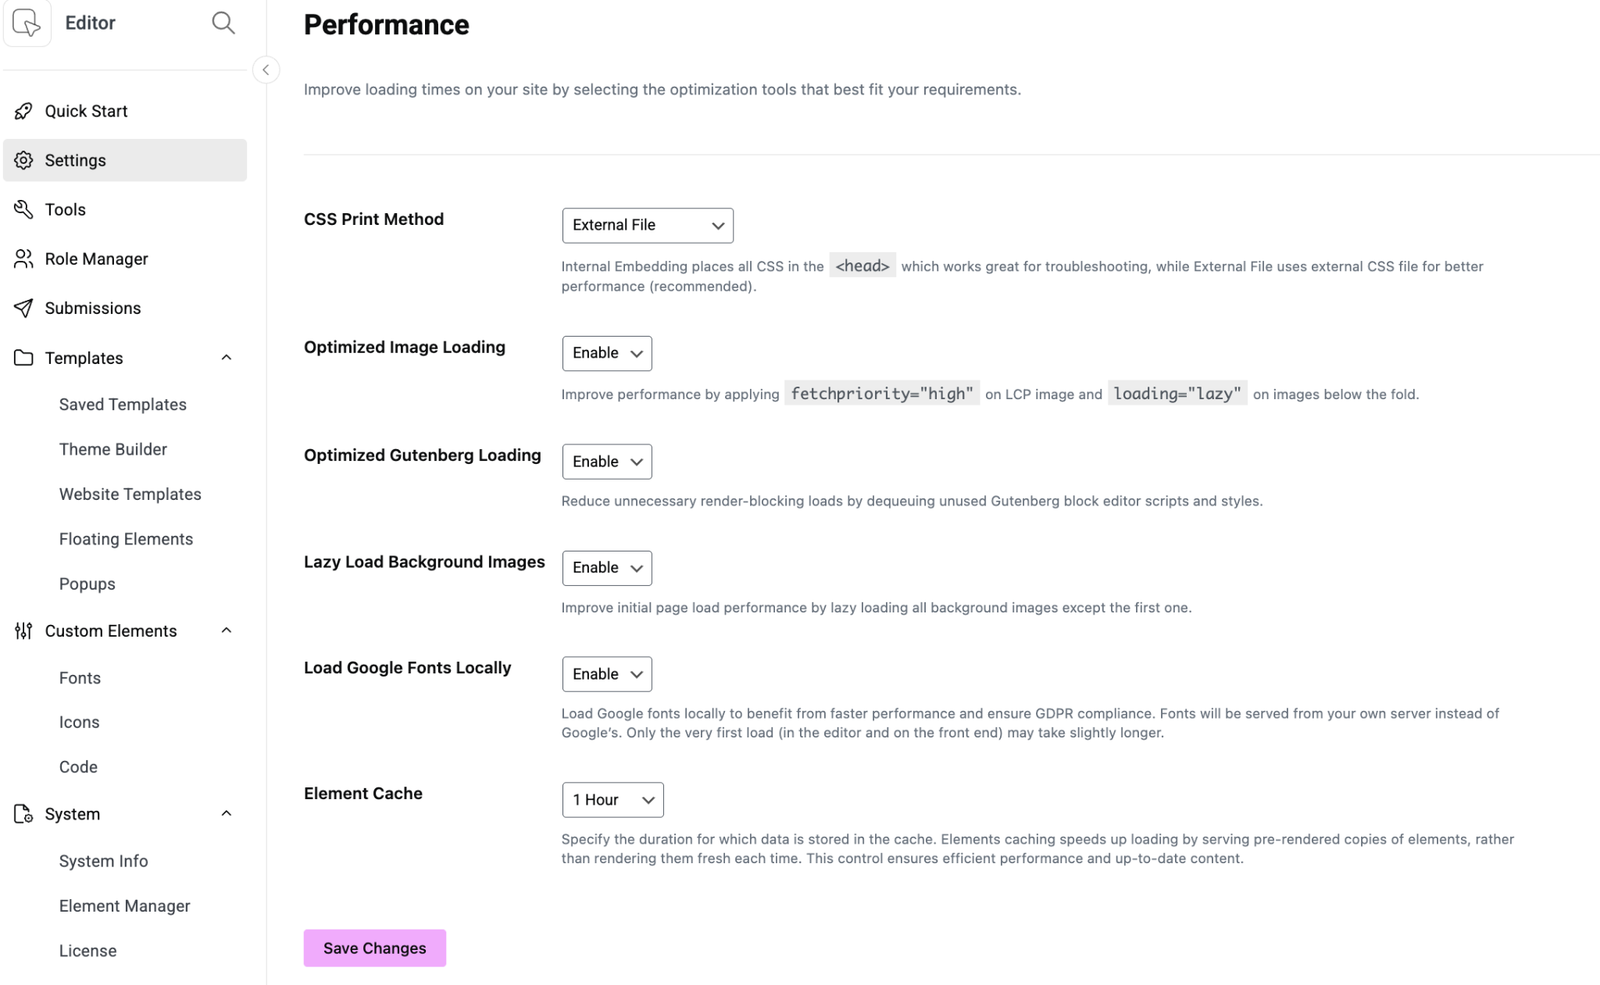
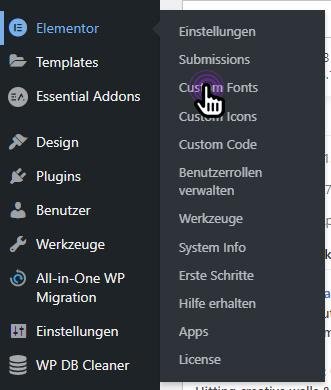
To be ready to create global variables for the texts used on the site, we first need to upload and create a local font within Elementor. This can be done by following these steps:
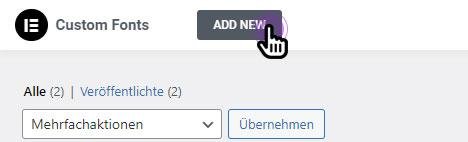
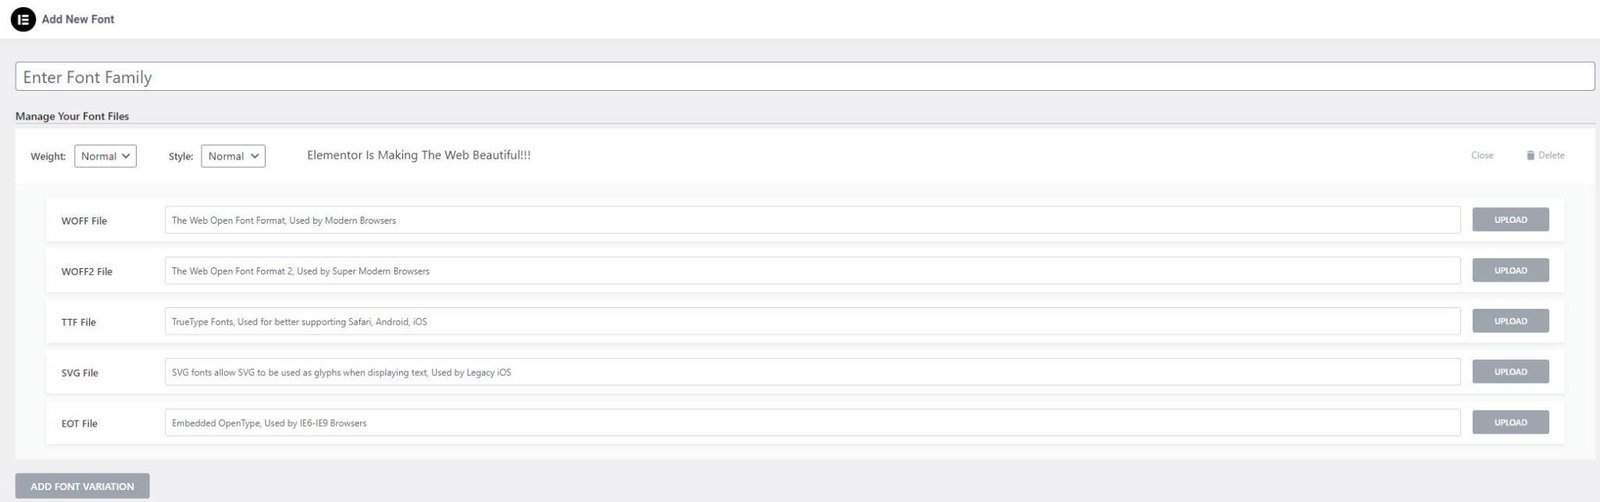
1.4.1Breaking headings at a specific point#
When we need a heading to break at a specific point, we've been using different approaches: <br>, hiding <br> on mobile, fixed max-width in px, etc. These all cause issues:
- breaks at weird places on smaller screens
- Hiding
<br>on mobile means extra markup + media queries - Fixed px widths don't scale with font size
- Better approach: Use max-width in
chunits.
h2 {
  max-width: 28ch; /* breaks naturally after ~28 characters */
}
Keep in mind this doesn't mean 28 characters — it's just 28 "0" characters width, but you just quickly try what value is a good match for you so the heading breaks where you want.
Why this works:
chis relative to the font, so it scales properly- If there's less space (mobile), text just reflows naturally — no weird breaks
- No extra
<br>elements or media queries needed - One line of CSS replaces the whole workaround
Homepage development#
The page builder exclusively used for developing home pages is Elementor. If Elementor Pro is not activated, please contact the person responsible for the project within the Slack channel.
All the important information you need for page development can be found in the development instruction sheet.
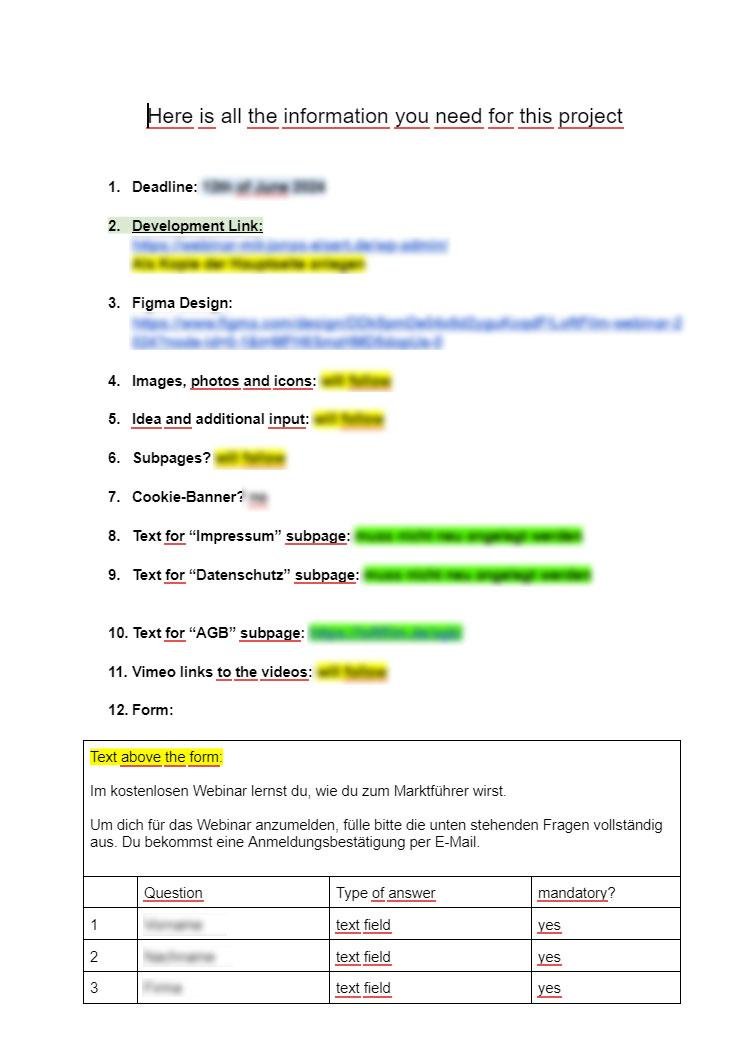
- Deadline for completing the development.
- Link to the site being developed
- Link to Figma containing the project design
- Google Drive with images and icons
- Additional ideas and input for development
- Additional subpages for the project
- Whether the site needs to include a cookie banner
- Text for the Impressum page
- Text for the Datenschutz page
- Text for the AGB page
- Link to the Vimeo video used in the project
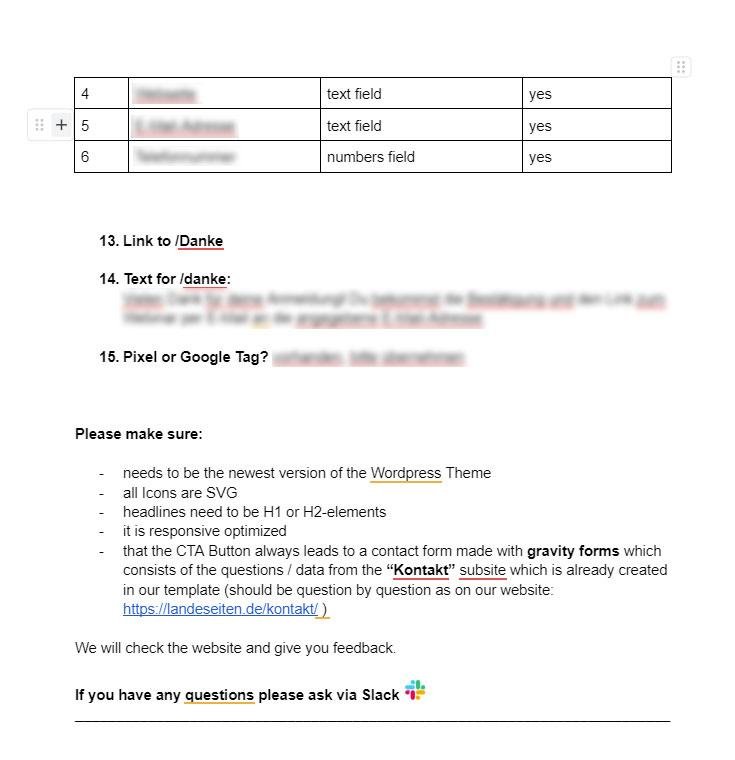
- Information for developing the contact form
- Link to the thank you page
- Text for the thank you page
- Code scripts for Pixel meta tags, Google Tag Manager, …
2.1Important development steps#
- Install WORDFENCE plugin
- When developing pages, use as few elements as possible within the DOM to ensure the page loads as quickly as possible — DO NOT USE TOO MANY CONTAINERS.This is important since it affects both backend and frontend page loading speed.
- Take into consideration the accessibility for the website.
- If a design segment in the project needs to be changed, inform the project manager. Do not add the designer you previously collaborated with on another project to the Slack channel.
- If the project is live, make sure to first make and test changes on the demo project.
2.1.1Plugin conflict — additional plugins#
- Use ELEMENTOR PRO ONLY to build your webpage. Use Essential Addons or Unlimited Elements when necessary only.
- Do not add any plugin that is not in the standard list of plugins. If an extra plugin is required in specific cases, first ask for permission.
- Do not mix Essential Addons and Unlimited Elements to build elements. Use elements from one of these plugins in your project only when you have to.
2.1.2Page accessibility#
The following points should be taken into account at the beginning of your web development project.
🧱 Semantic HTML — Use proper headings (H1 to H6), lists, and landmark elements.
Using proper headings (H1 to H6), paragraph, lists and landmark elements ensures that your website content is structured logically for all users. It helps screen readers interpret the page correctly and improves SEO.
🖼️ Alt text for images — Ensure all images have descriptive alt attributes.
Providing descriptive alt attributes allows visually impaired users to understand the content and purpose of images. It also helps search engines index your images more effectively. This means give an alt text to all images.
🎨 Color contrast — Ensure text contrast meets WCAG 2.1 standards (check with Elementor's color settings or tools like Contrast Checker).
Ensuring text meets WCAG 2.1 contrast standards makes your content readable for users with visual impairments, including color blindness. Tools like Elementor's color settings or Contrast Checker can help you verify accessibility. This means use enough contrast as possible.
⌨️ Keyboard navigation — Make sure interactive elements are focusable and navigable via keyboard.
Making interactive elements focusable and navigable via keyboard ensures users who cannot use a mouse can still fully interact with your site. This is essential for accessibility compliance and usability. This means when you have a link or button or field use the following: <a href="#">, <button>, <input>, <textarea> or <select>.
DO NOT use div or span for buttons or links or other interactive elements.
🏷️ ARIA roles — Use Elementor's advanced settings to add ARIA labels when needed.
Adding ARIA labels clarifies the purpose of elements for assistive technologies, enhancing navigation and understanding. Elementor's advanced settings allow you to implement these labels where standard HTML is insufficient. For example, buttons with no text (buttons that are only images or slider buttons) should have an ARIA label.
2.1.3Add logo and favicon#
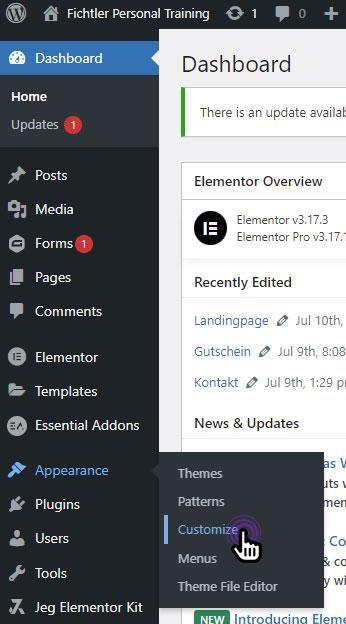
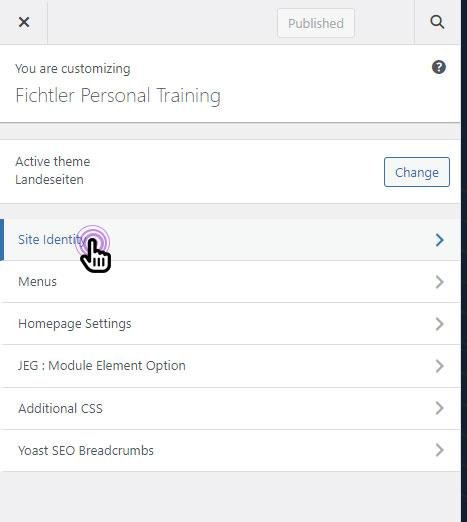
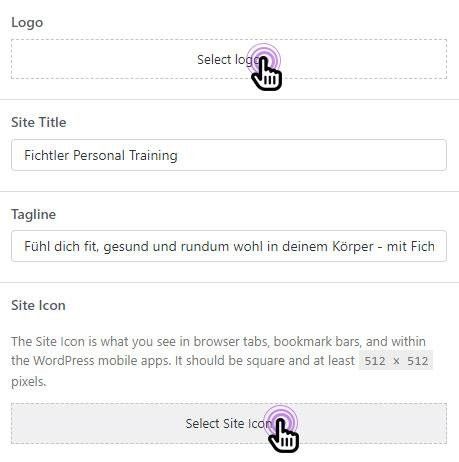
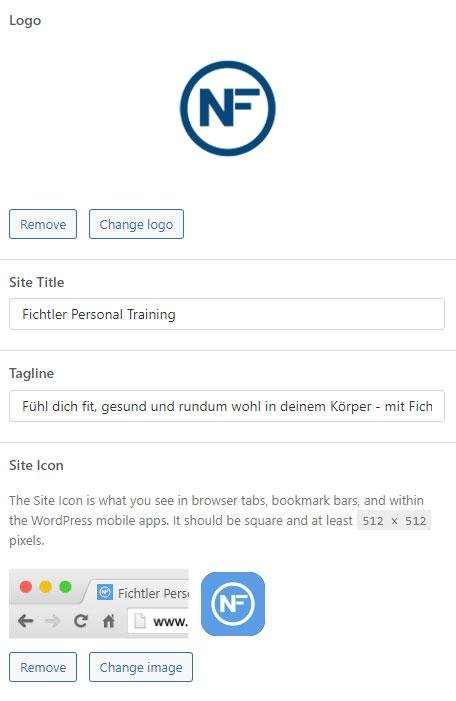
In the next section, you can see how to add the site logo and favicon.
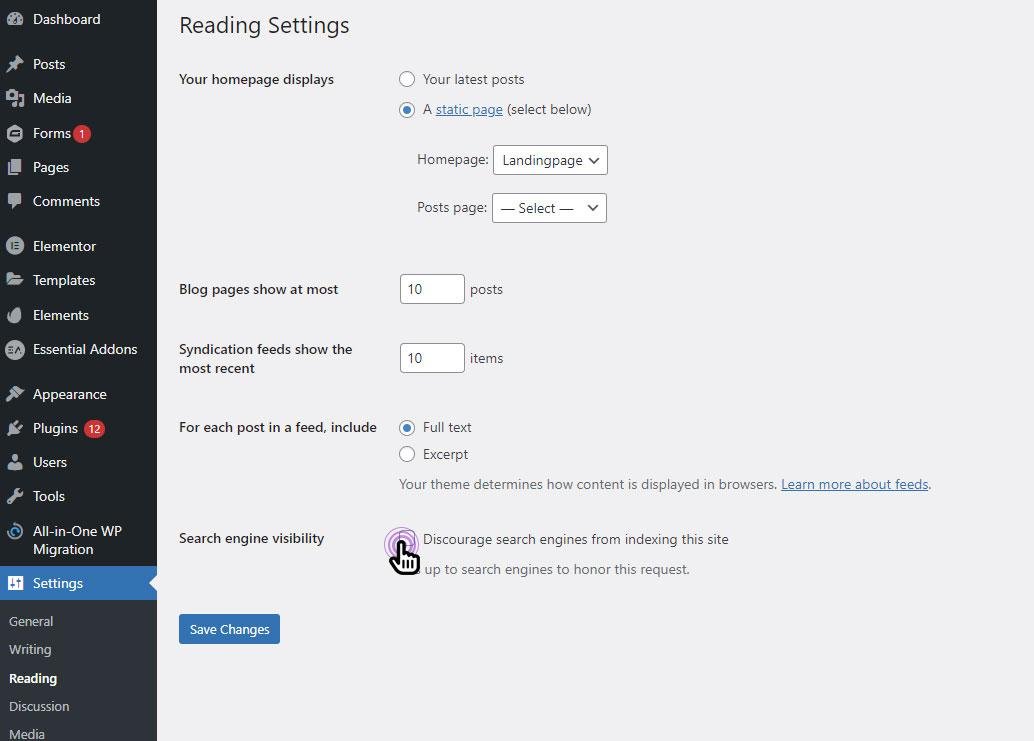
2.1.4Discourage search engines while developing#
Ensure that all pages in development are excluded from Google indexing while they are in the development process.
2.1.5Adding Vimeo videos#
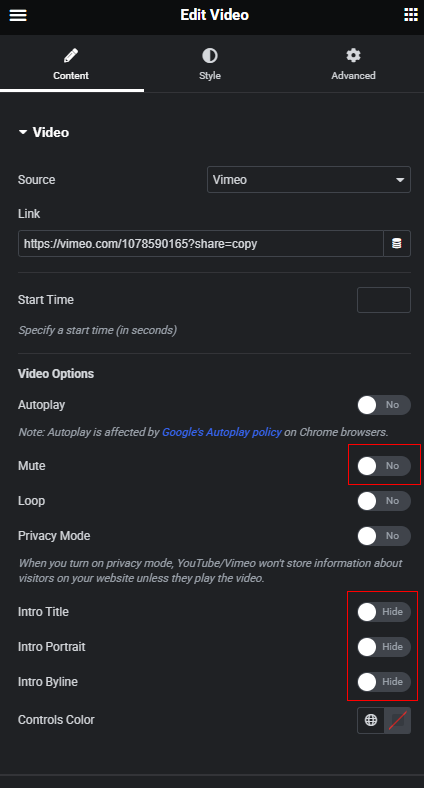
The Vimeo video added to the page must have sound enabled. It should be placed inline within the page to adjust the cookie banner settings.
2.1.6Cookie banner#
The default cookie banner we use in our projects is Borlabs. If this plugin is not installed or activated within the project, please contact the project manager who will install and activate it. After that, the initial setup of the Borlabs Cookie banner needs to be done. You can see how to do this in the video below:
Almost all our projects contain video materials downloaded from Vimeo. For this reason, it is necessary to block the content of these videos until the visitor allows it through the Borlabs Cookie banner. Similarly, all types of external content can be blocked in the same way. You can see how to block external content in the following video:
2.1.6.1Installing tracking tags (Google Tag, Pixel…)#
Always use the Borlabs Cookie plugin to set the tracking tags. You can do this similar to the video shown for the Vimeo blocker by adding a new blocker for your tag.
2.1.7Additional JavaScript#
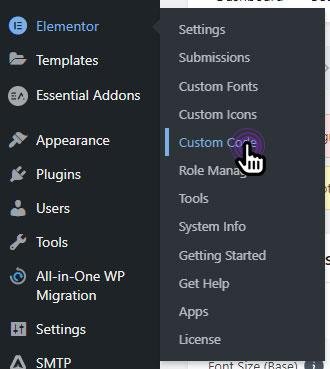
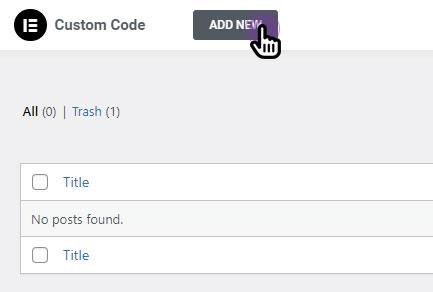
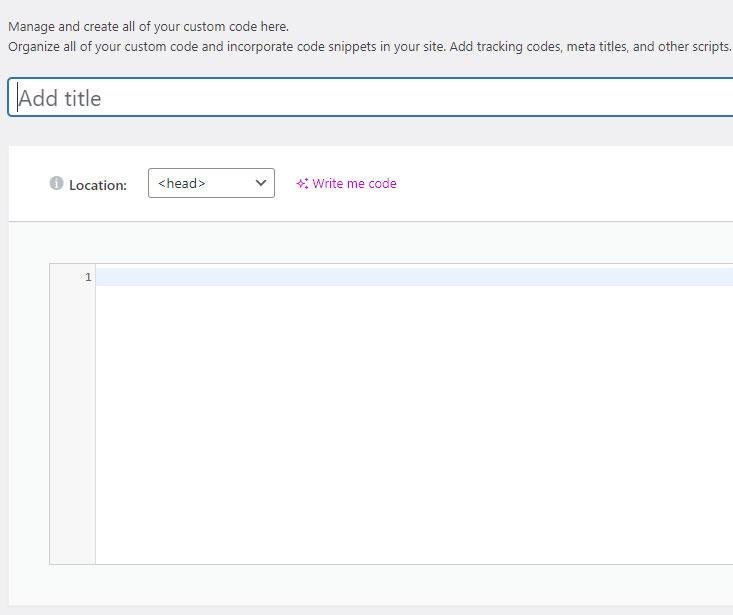
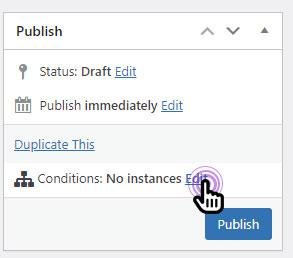
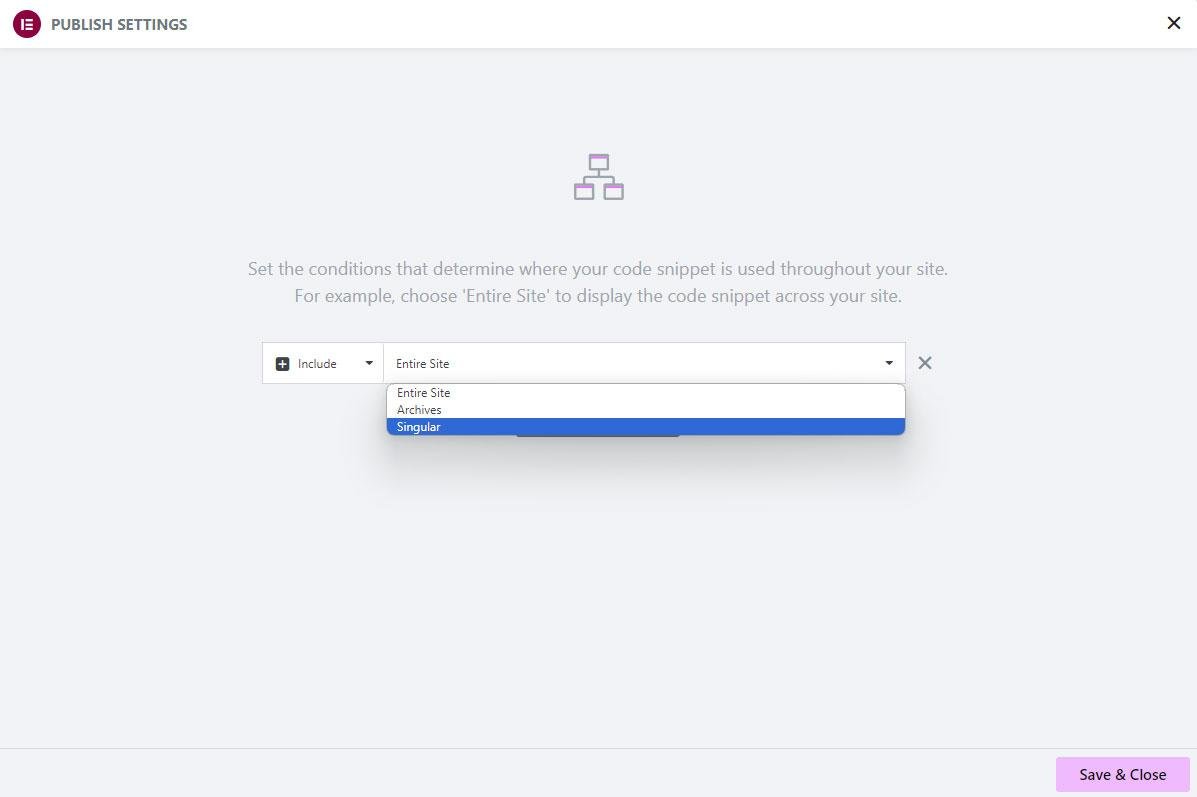
Additional JavaScripts must be done using the Custom Code option in Elementor.
2.1.8Do Not Repeat Same Scripts On Page#
When you use the same script multiple times on a page, you only need to include it once. After that, you can reference it as needed. For example, if you add the script below to the page using the HTML Elementor widget, you don't need to repeat it for each video. This is especially useful for videos from websites like Vimeo, YouTube, or Wistia, as well as when adding scripts for multiple Lottie files.
Example: Global loader (ONE HTML widget)
<script src="https://www.youtube.com/iframe_api"></script>
<script>
function onYouTubeIframeAPIReady() {
  document.querySelectorAll("[data-yt]").forEach(el => {
    new YT.Player(el, {
      videoId: el.getAttribute("data-yt")
    });
  });
}
</script>
You can place other videos by just referencing the ID:
<div id="yt1" data-yt="VIDEO_ID_A"></div>

<!-- Somewhere else: -->
<div id="yt2" data-yt="VIDEO_ID_B"></div>

<!-- Somewhere else: -->
<div id="yt3" data-yt="VIDEO_ID_C"></div>
Main page checklist#
Subpage checklist#
Contact form checklist#
5.1How to build a contact form#
In the development instruction sheet (see at point 2 in this document), we can see that point 12 is a table with questions for the contact form. When developing the contact form, we always use Gravity Forms for creating forms, configuring them as specified in the development instruction sheet. Additionally, each form must be configured in steps, meaning that each question is displayed as a separate step.
In this video, you can see how to create a contact form using Gravity Forms, how to build a multi-page form (one question at a time), and how to set up conditional logic.
5.2Landeseiten Form Plugin#
In the next step, we use the Landeseiten Forms Plugin to style our form and customize the default texts (error message, button text, etc.). This plugin takes care of everything, and it must be active, so the form functions are set up as are required by Landeseiten. For example, the plugin creates a step-by-step system for the forms, makes the buttons work with Enter and also auto-focuses onto the fields. You can see how to use the plugin in the video below.
Termin page checklist#
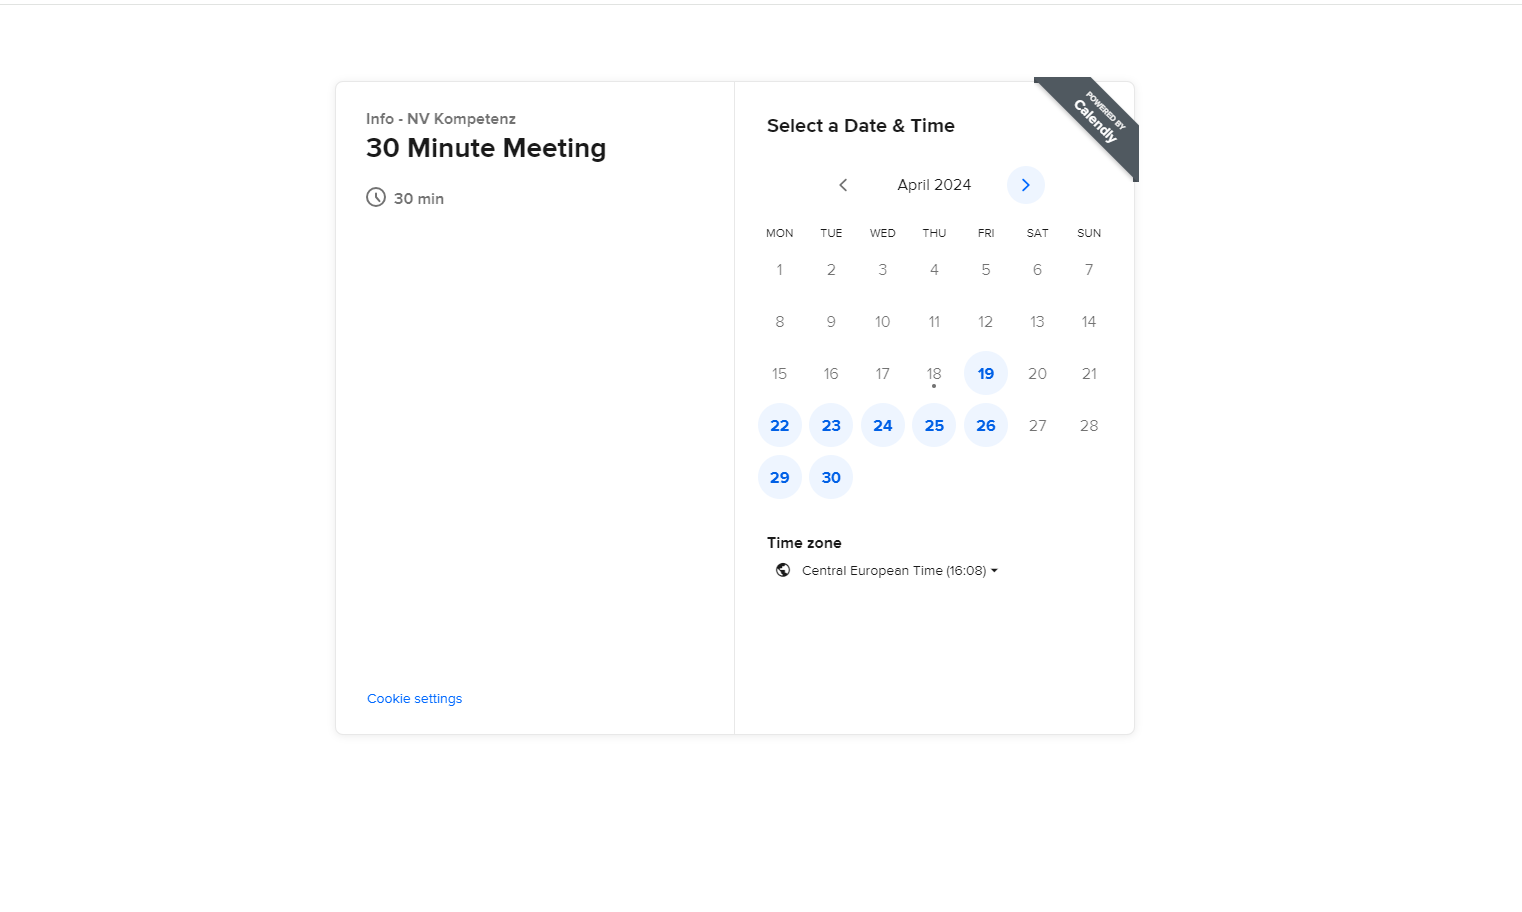
🔗 Example: gesundwerk-nuernberg.de/termin/
In the example, a booking service is Calendly.
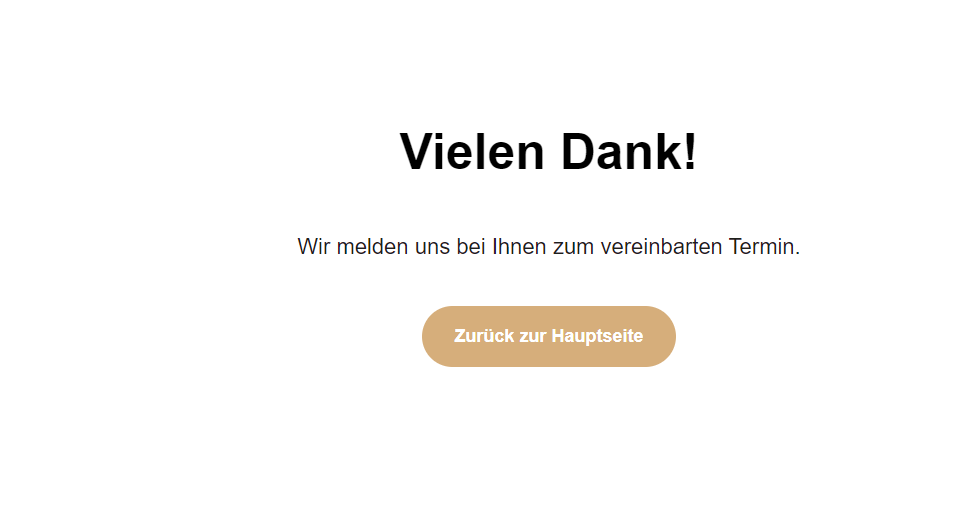
Danke page checklist#
🔗 Example: nvkompetenz.de/danke/
404 page checklist#
Impressum page checklist#
🔗 Example: nvkompetenz.de/danke/
which means: "This website was written, designed, and developed by the web agency Landeseiten.de". Make sure that Landeseiten.de is linked correctly here.